Wednesday, August 21, 2013

More donated parts

So George was kind enough to also donate 2 resin octagon ports.  They need a little cleaning up and one little piece fixed but I think it's doable.

This brings my list of donated parts to:

Alu restraining bolt v1 with earth magnet - Mike
(3) Clear HP lens - George
(2) Resin octagon ports - George


DroidCONduino kit ordered

Ordered a DroidCONduino kits minus the PCB from the infamous Michael Erwin.  Don't know if I'll use it anytime soon but I'd like to play with the I2C setup with the RSeries controller system later on.

Dome progress and error

Got some work done on the inner dome.  I wound up cutting the top off the inner dome as well as cutting the lower portion open so I can size it properly.  I need to get some bolts for the hinges in the upper portion of the inner dome so that its read to be bonded in. Then I can work more on the lower section.  So my first error turns out to be the fact I cut out all the pie panels on the inner dome including the section where the upper HP is supposed to go which I wasn't supposed to cut out.  I don't think this is going to be a real problem though as I can easily add in a replacement.  Looking at how the HP rings go in I think this might be a blessing in disguise.  We'll see once the new HPs arrive and I can look at how they go together.


HPs and radar eye

Ordered a set of 3 HPs as well as a resin radar eye from WORR.  They should ship out this weekend. The HP lenses the George was gracious to donate to my droid should complete the HPs nicely.  I just need to see about picking up some locking rings to hold the lenses in place.  

Of course that means I'm gonna need to decide on a paint and method.  I think I'd like to include the Rub-n-Buff I've read about on the forums.  Have to see where to get some but it's gonna be a while before I need it since that's the last step after any weathering I decide to do.

Should pick up some PSI diffusers on Thursday from Mike.  I think this completes the external parts for my dome so I can hopefully start painting and assembling soon.  I'll check with the guys and see if I am missing anything.  I do need servos for all the pie panels but I plan to add those later.

Hinges delivered

So the hinges arrived today.  Some loose test fitting looks like the will fit.  I may have to cut a small notch for the hinge in the inner skin to place the hinge correctly but I don't have an issue with that.  The small screw in the pivot point lets me tighten the hinge as needed for tension and eliminate the small wobble.  The arm has nice attachment points for the servos so I am hoping these will work well.


Monday, August 12, 2013

Teeces udate

I finally broke down and bought a desoldering iron.  After the second failed attempt to replace/fix and LED on FLDs I'd had enough.   With the desoldering iron, replacing the LEDs is a snap and it doesn't burn out the replacements trying to fight it through the old solder.  (Go figure) So now all my Logic LEDs work.  YAY!

Been slowly working on Logic sketch to integrate JawaLite into the Teeces Logics.  The Arduino implementation of C is not perfect.  Tried to make some nested CASE block inside an IF/ELSE statment and Arduino doens't like it.  Not sure why as from what I can find online other people say it should be possible.  For now I've had to write teh sketch to include some duplicate code that the nested CASE statements would have avoided but at least I can now use either Latin or Aurebesh lettering.  I still have to hard code which to use until I figure out the "sending/receiving" of strings from the Marcduino.

On the down side, I am beginning to suspect that George was right when he mentioned that he didn't think the Pro Mini would have enough memory to hold all the code needed for the different Jawalite commands needed.  I may have to upgrade to the Micro as it has double the memory.  We'll just have to see what happens as the code grows.  I'm probably gonna wind up commenting code sections out as I work on other pieces and then put the whole thing together at the end.
Wow, its been a while since my last update.  Lets see, whats happened since.

1.  Maker's Faire was fun and I got to meet more of the local KS builders.

2. I've done some work on my dome and also made my first mistake.  Pics and details to come soon.

3.  Local Builders had a build day over at George's place.  That was fantastic.  Learned a lot about what I got ahead of me and some things to watch out for.  I think Brandon was the one who pointed out that I made a mistake on my dome inner skin.  (see updated item 2)

4.  I've ordered some hinges from China that I think are going to be great for the dome Pie panels.   they are plastic and come with ready made attachment points for servo linkages.  They are pretty in-expensive too but the shipping wait is annoying so I ordered 3 sets to make sure I have enough and some spares.  Once those arrive I'll post some pics.

Friday, June 28, 2013

Maker's Faire Load-in

R2 Booth, 2 tables yay
 Pics for setup at Maker's Faire KC 2013.  We are outside unfortunately but we're close to the front doors for "random" trips to wander inside.


Booth right in front of the main doors

Generator right behind the booth

Booth Tables

Center 3 door are wider for R2 access


Loading Map

Rugs should be able to roll up

Sidewalk behind the booth

Thursday, June 27, 2013

Sizzled replacement

My replacement Xbee break out arrived today.  2 days early.  I'm a fan of sparkfun.com and their derive desk.

Wednesday, June 26, 2013

Fried and sizzling

So trying to prep my Teeces for full testing I started trying to make some half baked connection cables and my power cable for the marcduino Master board was crud and I wound up fring my Xbee break out board.  It made a nice pop and sizzle sound.  Even had some smoke drift by.  According to my USMC computer trainer, it needs that smoke to work, so I've ordered a new Xbee break out board (it should still have the smoke inside) and some real connection cables.

Monday, June 17, 2013

RLD assembled

So the PCBs and LEDs arrived Saturday, just in time for Father's day. 

I only got one LED backwards in the RLD (I don't have anythign else finished yet), pulled out and think I fried it in the process.  I have to replace that one.  Those are a PAIN to take out. 

I have the RLD assembled but it doesn't look right.   The 1/3 of the LEDs on the Right (next to the Mini) are real bright, but the rest of the LEDs are dim.  They all light up and flash, flipping the LEDs makes them go super bright so I know they are put in correctly.  Switching around the IC's doesn't change which LEDs are bright/dim.  I've tried 5 ICs and in any combination its the same.  The right 1/3 is bright, the rest are dim.   Trying to figure out what is wrong with it.


Friday, June 14, 2013

Makers Faire announcement

So the KC R2 Builders are going to have a booth at Union Station for the Makers Faire.  With all my parts and pieces I should have lots to display on the table.

Periscope and HP

Bought a resin periscope and movable HP.  Hopefully they will arrive soon.

Shipping

So the HP light kits and the Teeces PCBs have finaly shipped!  I should have them this coming week.  Now Ijust need the LEDs to arrive from Hong Kong (I think they are stuck in customs).

DOME

So R2's head arrived a couple days ago.  It arrived it perfect condition and in less than 5 minutes I broke it. :(

It's just a small piece and I can fix it when the dome layers are bonded together.

I numbered all the panels and smoothed out the tabs that were already broken.

Cut a chunk of extra off the inner done edge and also separated the outer ring.


Broke it!


Monday, June 10, 2013

Video of end Product

Here's a short video of one of my local builder compatriots Travis and his droid at Lego Land here in Kansas City.  The hope is one day my droid can look and sound as good and of course the kid coing up toward the end makes it all worth while.


Sunday, June 2, 2013

MarcDuino Part 2

So I've assembled and flashed the HP Controller code to the Slave MarcDuino board.  This went much smoother than the Master board even with changing laptops and having to re-install AVRDude, though Burn-O-Mat still doesn't have the ATMega328p as a valid option so back to the CLI commands and I got my 1 sec blinking red LED.  This code flash is mostly just to test the assembly of the board.  The code will need updating to work with the Teeces displays.

/opt/local/bin/avrdude -C /opt/local/etc/avrdude.conf -p m328p -P usb -c usbtiny -U efuse:r:./efuse.hex:i -U hfuse:r:./hfuse.hex:i -U lfuse:r:./lfuse.hex:i


/opt/local/bin/avrdude -C /opt/local/etc/avrdude.conf -p m328p -P usb -c usbtiny -u -U efuse:w:0x07:m -U hfuse:w:0xDF:m -U lfuse:w:0xFF:m

/opt/local/bin/avrdude -C /opt/local/etc/avrdude.conf -p m328p -P usb -c usbtiny -U efuse:v:0x07:m -U hfuse:v:0xDF:m -U lfuse:v:0xFF:m


/opt/local/bin/avrdude -C /opt/local/etc/avrdude.conf -p m328p -p m328p -P usb -c usbtiny -U flash:w:/<src>/HPController_v1.2.hex:a

Teeces Annoucement

So seeing as there is apparently no date in sight on when a JEDI display will be available, I've committed myself to using a Teeces display setup.  My fellow builders are joyed that someone took up that challenge.

So far my research is pointing at 2 approaches.  I can either drive the displays directly from the MarcDuino with major code updates or I can use a Arduino Micro to drive the display and just code the MarcDuino to send the Arduino Micro jawa commands.  I'll probably attempt both at some point.

Teeces Lighting Info:
http://astromech.net/droidwiki/index.php?title=Teeces_V3_Dome_Lighting_System

Orders Orders Part 2

Ok so some orders have arrived over the last couple days:

MarcDuino PCB and components which I've assembled and installed the HP Controller code and that seems fine.  This code will probably be updated later for the Teeces setup.

Teeces Components are here as well except for the IC's which are enroute from China.  Still waiting on Osh Park to ship the Teeces PCBs.

Alu Dome topper and Reson dome bumps arrived.

Droid Con 2011 DVDs are in and I've watched some of Disc 1 and 2 but there are spots on both that aren't viewable so it skips occasionally.

Wife's Cake and we'll eating that later today  YAY!

Friday, May 24, 2013

Orders, orders, orders

Big day for ordering.  Ordered:
(1) 300mm styrene dome  (hopefully this goes through before all the domes are gone seeing as I echecked the payment and it take 3-5 days to process)
(4) HP lights (one extra for spare)
(1) DroidConn 2011 DVD set
(1) Slave MarcDuino board and components
(1) Cake, oh wait that's for my Wife not my R2.  LOL

I'm really excited about the dome order.  I've got the brains ready (see Marcduino board) all ready to put into the actual head.  Not looking forward to all the sanding though to get the 2 layers to fit together right.  :(

Read back over the Marcduino board documentation again and realized I needed to order the slave board for the HP lights.

Friday, May 17, 2013

I think something moved?!!!

So for a small donation of $14.11 at the local MicroCenter I was able to obtain a Parallax Standard (Futaba) servo.  Thanks to this little gizmo I was able to successfully test all 10 servo connections respond to the R2 Touch app.  The servo only turns about a 1/4 turn and prsessing close twice makes it spin just that little bit more.  I suspect this is just the min/max settings that the Marvelous Marc set as default in the code.  I can always adjust this "throw" later once I have a dome and panels all cut out and hinged,  and the servos mounted.

Wednesday, May 15, 2013

WiFly Connected

It LIVES!

Ok so it's not that dramatic but I finally got the WiFly setup and connected to the MarcDuino and my iPad connected to them. feels like a big achievement but only because my Mac was being uncooperative.

Master MarcDuino default program loaded

I finally got my MarcDuino Master Controller Board firmware loaded to the board.  The AVR Burn-O-MAT refused to read the full avrdude.conf file to see the ATmega328p IC to program it.  I had to finally use the nice GUIs to build the avrdude CLI command strings and run them manually after editing the IC model approbriately.   What a mess that was but as you can see my clocking LED blinks 1/s as expected after the load completed.


As always, for more information on the MarcDuino or its code, go look at the its master's page @ curiousmarc.com

Tuesday, May 14, 2013

Arduino

Ok, so I broke down and picked up an Arduino Uno at Radio Shack today.  It was only $35.   I went to see about some connector cables to fit on the MarcDuino board pins, but alas Radio Shack doesn't carry them, at least in store.  I'm there looking through the micro-controller packages on the wall hoping for some cables, and there on the bottom shelf look so lonely was the Uno. No price tag so when asking the clerk what it cost I couldn't walk away.  Adafruit.com where most people I've seen buy their Unos lists it at $29.95 and shipping is another $3.99 so I basically paid for tax instead of shipping, and no waiting.  :D

WiFly part 2

My WiFly and accessory boards along with the AVR Procter programmer arrived yesterday.


 The board with the attached ribbon is the pocket programmer needed to program the MarcDuino board.  The USB board on the left is the WiFly programmer.  The board on the right is the socket for connecting the WiFly to the MarcDuino board.  And the lonely board in the middle is the actual WiFly itelf.

WiFly and accessories
After a long time of trying to get the AVRdude to see the USB port, I can finally read the fuses on the Marcduino board from the command line. I still have to get the Burn-O-Mat GUI to see it though. Seems to be missing the ATmea328p MCU in the dropdown list.

Trying to use cool term for programming the WiFly but that doesn't recognize the USB port yet.

To be continued..

Saturday, May 11, 2013

CNC Routing

Day 2 of CNC routing class @HammerSpace. Introduced to the very cool process of letting Inkscape trace out a pic to get all the vector drawings done quickly. I'm trying to get it to trace the skin plans on the yahoo group which worked accept it seems to be the wrong size. Need to find the dimensions so I can scale it down correctly.

Friday, May 10, 2013

WiFly

Ordered the WiFly, the pinout board, and the USB pinout for programming board today.  Also ordered the AVR Pocket programmer.  This time next week I should be able to connect my iPad to the MarcDuino board.   It still won't do anything since I don't have any servos or sound board yet.  Think I blew my budget for the month though  :( . 

Hopefully the CNC classes will open up the frame building soon but I have the next month to dig through the Marc's code to understand what its doing and what I may or may not want to tweak.

Tuesday, May 7, 2013

MarcDuino part 1

My first MarcDuino board and components arrived yesterday. I actually got to "build" something and the master board is assembled! Still need to order the slave board at some point, it's pretty inexpensive ( cheap just sounds like poor quality which I do not wish to imply ) too, only about $13.50 plus shipping.


Parts
Assembled

Wow some of those look a lot worse here than in person

Not all the soldier joins are great, a little blobby at first but they got a lot better toward the end. If you can't tell the IC in the middle and LEDs were the last things done.  I am quite happy with my soldering  seeing as I haven't soldered anything in over 2 years.  Now only if I had remembered to order the PocketAVR I could install the code and run a system test.

Monday, May 6, 2013

First droid builder meet

So yesterday David and I went over to Mike's house for some building. It was great fun. Helped Mike and David start the cutting into David's Alu dome. Tin snips worked pretty well. I would have thought it would deform the inner dome when we trimmed the bottom edge to near size but no, no noticeable deformation that the inner ring wouldn't fix easily.

No work on my build yet. Not really anything to work on yet.

.
.
.
Still.

Friday, May 3, 2013

R2 Touch

Been eyeing the R2 Touch app by CuriousMarc. The demos look awesome. I want to use this interface so much I bought the app without anything to use it on. I figure I would hate to loose the chance of having it if for some reason it disappeared by the time I actually need it, plus any help for future development can't hurt.

OMG. Even with nothing to use it on its pretty cool to play with. Ordered the Marcduino board and components too.

Progress made even if its not practical yet.

R2 Touch/MarcDuino Info:
http://www.curiousmarc.com/r2-touch-r2-d2-remote-control-iphone-app

Monday, April 29, 2013

Mock paint design

I was thinking I'd like to have an extra painted skin design for R2 that I could dress him up for Toys for Tots. Here is my poor attempt at an artistic rendering. I gotta figure out if this would be a separate complete droid or just a swappable skin.


Look what I found on my shelf.

So turns out I already had an 12V 18 Ah SLA battery in my garage. Couple years ago I bought an old razor scooter from a neighbor's garage sale. Bought the battery to try and fix the scooter but the controller circuit board was fried so I tossed the scooter. Sadly I didn't think to keep the motor which worked. So I just need one more battery for my currently theoretical R2!

My first parts!

My first parts arrived on the 24th of April, so it's a day of note. Ordered them from resinparts.com and received them pretty quick. It's going to be important to remember that parts are rarely going to arrive so fast.

R2 Obsession, it's Begun!

So after years of wanting a functional R2-D2 of my own, I've finally begun the long and expensive ( and hopefully rewarding ) journey to build one.

Growing up, R2 was a favorite from the movies though to be honest I spent more time wishing I was a Jedi ( seriously, who doesn't want cool mind powers? ), but R2 was the computer geek in me that I felt most relatable to.

I seem to recall a horrible attempt at a lego R2-D2 back in the 80's. I didn't have anything but the regular square and rectangular bricks so "round" was relative and I couldn't stand looking at it more than the time it took to build.

Fast froward to age 30+ and my family got one of the small R2 toys that has voice control and some random movement patterns. Looked fun but quickly turned disappointing as most of the voice commands are just ignored.

My wife the illuminated me to the existence of the Celebration events and we flew off to CV ( Celebration V to you uninitiated ) and OMG I found life sized functional R2's! Spent some time in the R2 Builders room and went to all the Builder panels I could squeeze into my schedule. I think I joined the builder forums while still in Orlando!

Astromech.net is an awesome resource for anyone at any level who is interested in building a droid of their own. The amount of info is simply staggering. I spent the next few years reading threads here and there and generally being discouraged by

1. The sheer amount of information to go through.
2. The massive amount of work required.
3. The large financial commitment.
4. There weren't any local builders.
5. Lack of tools which leas back to problem 3.

I still went to any R2 event or panel I found at conventions. CVI was great since I knew ahead of time to schedule for the panels and the Builder room was incredible. Spent hours in there that trip. I think I spent an hour just talking to someone about the LED logic display board he was working on there on a table.

Still weren't any local builders that I knew of and the closest builders I did know of we're 4 hours away in either Omaha or St. Louis.

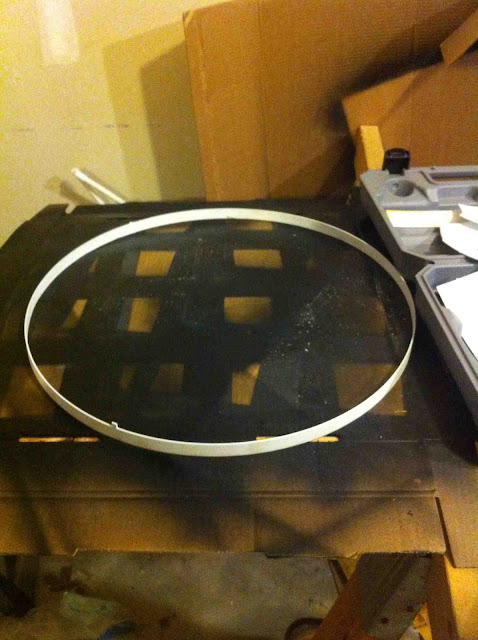
Fast forward again to Planet Comic-Con this year and lo and behold there is a Builder's booth and a panel to go to. I was very surprised to learn they were even local builders! So now armed with some encouraging information on local resources and encouragement from my wife, I bought a couple resin parts and started down the path, light or dark, can't say yet but at least it's direction.